TommyZees
1965-1973 Mustang Shelby Boss 302 Coil Spring Compressor
1965-1973 Mustang Shelby Boss 302 Coil Spring Compressor
Couldn't load pickup availability
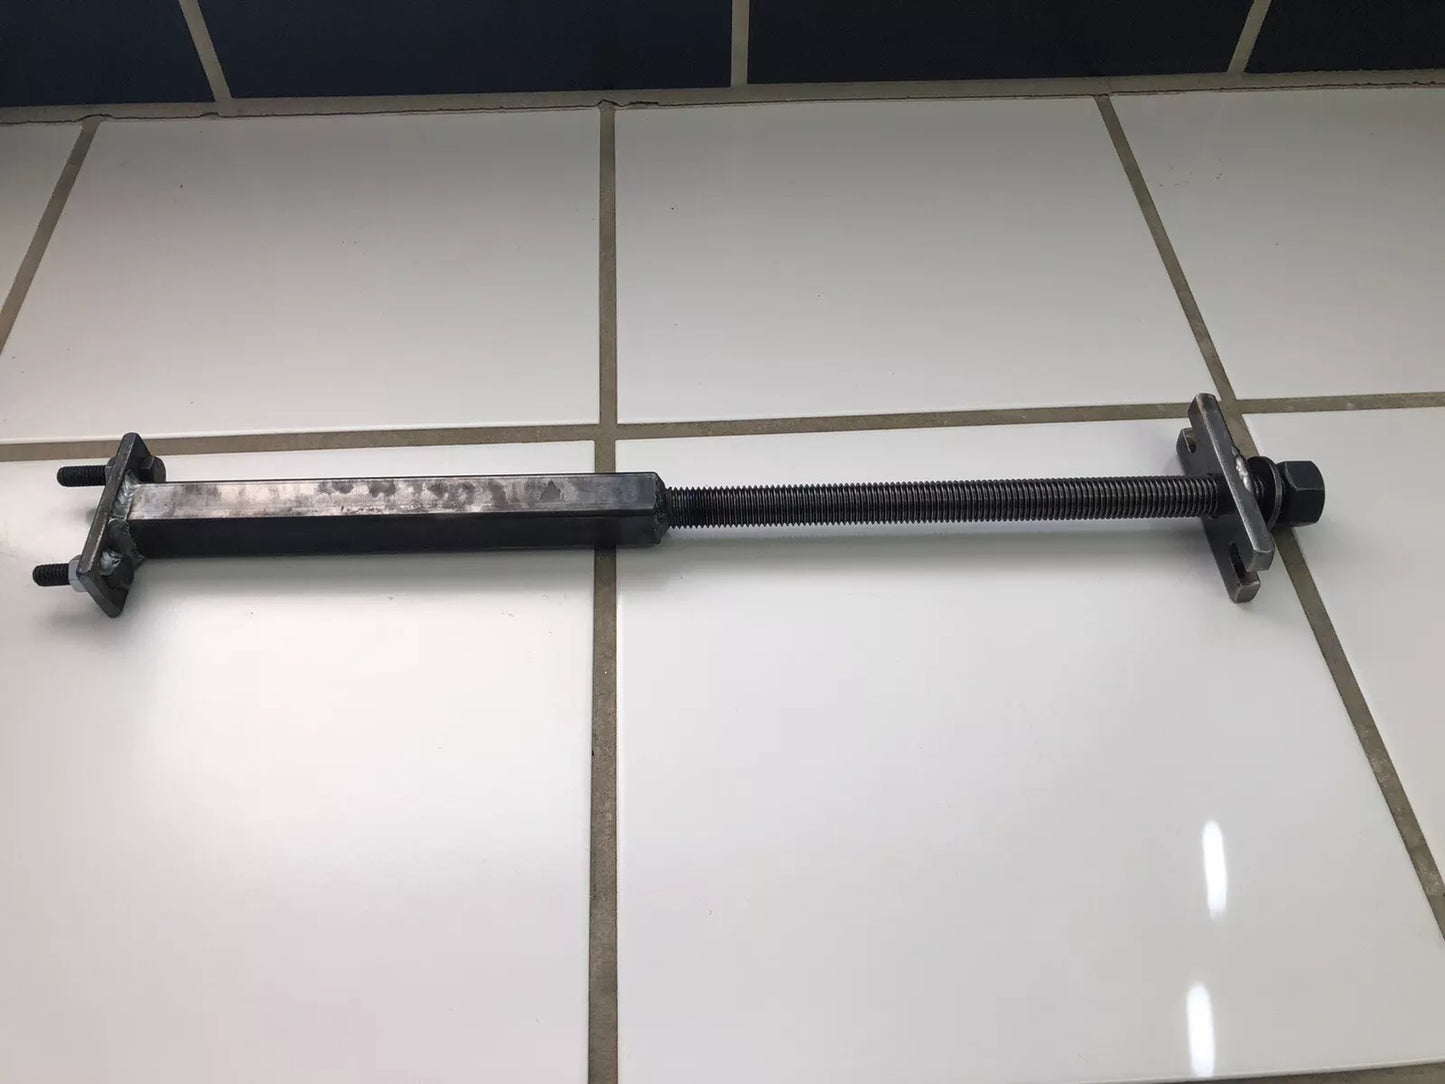
TommyZee’s Heavy-Duty Front Coil Spring Compressor
Fits: 1960–1970 Falcon, Fairlane, Ranchero, Torino, Comet, 1971–1973 Mustang, and 1971–1972 Cougar
This is the original, proven front coil spring compressor trusted by Ford and Mercury enthusiasts for over 30 years. Designed to safely remove and install front coil springs, this tool is a must-have for classic suspension work.
⚠️ Top plate only needed for early Mustangs.
⚠️ Will NOT work on 1962–1965 Fairlanes.
⚠️ Tool is shipped unpainted – I do not have EPA-certified paint facilities. Lightly oil the tool to protect the surface. It will get scratched during use.
Compatible With:
-
1960–1970 Falcon, Fairlane, Ranchero, Torino, Comet
-
1969–1977 Maverick and Mercury Comet
-
1971–1973 Mustang
-
1971–1972 Cougar
Built to Last – Trusted by Thousands
-
Fabricated by hand in my West Texas hot rod and race car shop
-
Over 30 years of field-tested design
-
Made in the USA – not an imported knockoff
-
I’ve sold thousands of these compressors to satisfied customers
-
I stand behind every unit and am always here to answer your questions
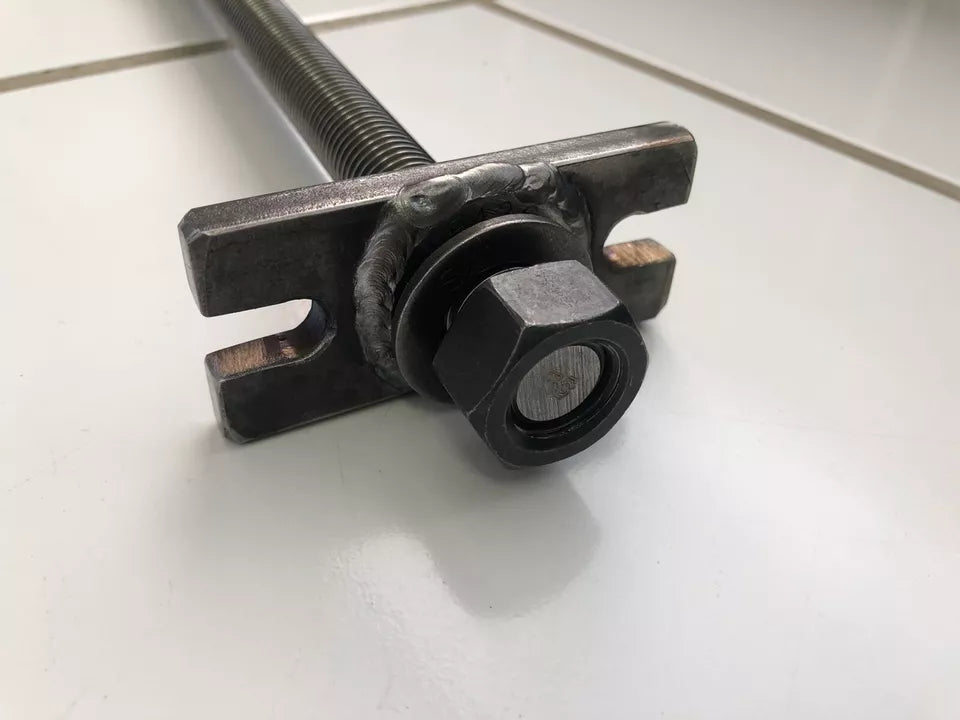
Technical Features:
-
Super heavy-duty 3/4"-10 (B-7) grade threaded rod
-
.120" wall square tubing – pipe is NOT used
-
Precision MIG welded by a certified welder
-
3/8" thick x 3.5" x 1.5" steel top plate spreads load safely
-
1/8" SAE hardened washer welded to prevent wear
-
Safe, reliable design – no shortcuts or compromises
✅ Do not settle for thin plates, pipe, or knockoffs. This is the real deal.
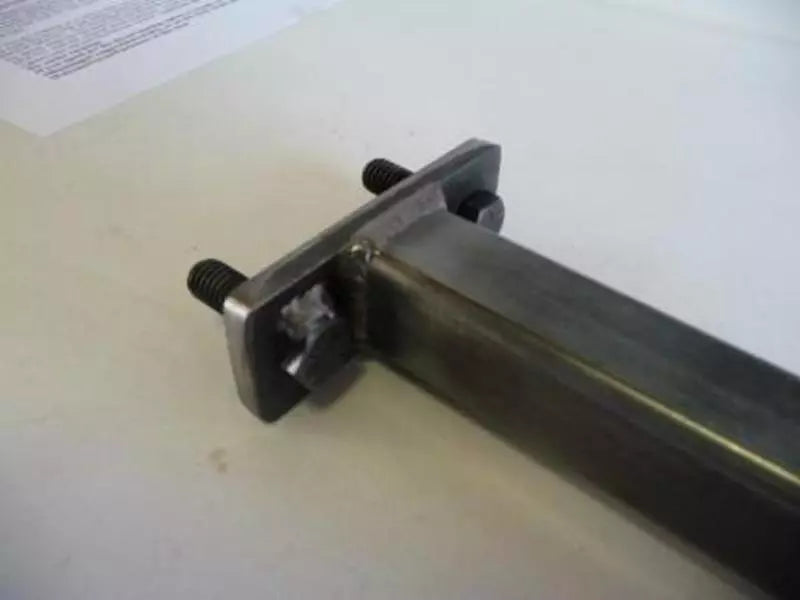
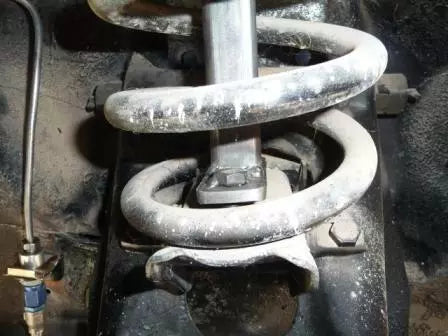
How It Works:
-
Insert the tool through the top of the shock tower
-
Bolt the lower end to the spring saddle
-
Reinstall the upper shock tower mount
-
Thread on the washer and nut, then turn the nut to compress the spring (about 3")
-
Unbolt the spring saddle and upper control arm
-
Reverse the nut to release tension
-
Reinstall by reversing these steps
Includes:
-
Spring compressor tool
-
Detailed printed instructions
-
Ongoing support from the builder (me)
Check out my other listings for roller bearing front coil spring perches and other suspension components for classic Mustangs, Falcons, Rancheros, Comets, and Cougars.
Spring Compressor Instructions
READ FIRST:
-
PLEASE READ AND UNDERSTAND THESE INSTRUCTIONS COMPLETELY BEFORE USING THIS TOOL.
-
THIS TOOL WILL NOT WORK ON '62–'65 FAIRLANES.
-
USE THIS TOOL AT YOUR OWN RISK. IF USED PROPERLY, IT IS VERY SAFE.
-
You can refer to the original eBay listing for an illustrated version of these instructions.
-
Lubricate the threaded rod and nut with WHITE LITHIUM GREASE — NOT WD-40!
-
The flat plate is used only for Mustang and Cougar applications.
-
One stud is made slightly longer to help reach the spring perch holes when the perch is angled.
-
The flat plate is drilled to fit both early (’64–’66) and late (’67–’70) Mustang patterns — it is not mis-drilled.
-
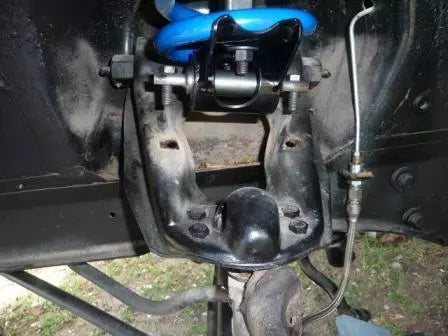
Your upper shock mount MUST be reused and bolted back to the shock tower. Do not use this tool without the upper shock mount in place.
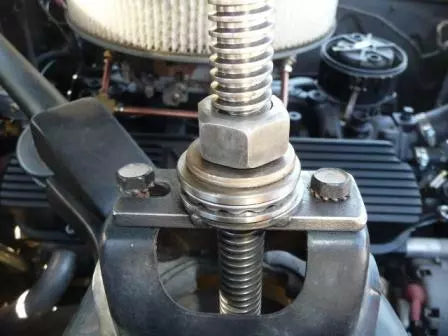
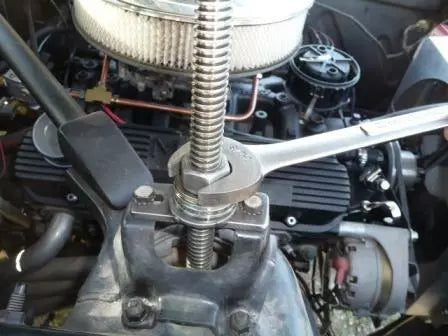
Step-by-Step Instructions:
1. Safely support the vehicle on jack stands and remove the front shocks.
2. Insert the spring compressor down through the shock tower (threaded rod facing up).
Attach the lower end of the tool to the lower spring seat, just like the lower shock.
Install the flat washers onto the studs before the nuts, so they don’t pull through the spring seat.
Reinstall the stock upper shock mount using the original hardware.
3.
-
If your car uses a stud-style upper shock, skip this step and just install the large washer and nut over your stock shock mount.
-
If you have a Mustang or Cougar with a two-bolt upper shock, slide the flat plate over the threaded rod and bolt it to the stock shock mount using the original hardware.
-
Then, install the washer and nut on the rod and tighten until the nut touches the washer. (Use motor oil here for easier turning.)
4. Begin turning the nut clockwise to compress the spring.
Only compress it about 3–4 inches — just enough to unbolt the lower spring seat from the control arm.
DO NOT try to fully compress the spring.
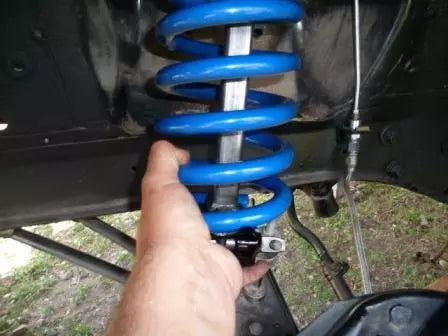
5. With the spring compressed, unbolt the spring seat from the A-arm.
Next, remove the A-arm retaining nuts from inside the engine bay.
You can rotate the A-arm out of the way without removing it from the spindle.
If it's difficult to remove, compress the spring slightly more.
6. Once the A-arm is clear, slowly release spring tension by backing off the 5/8" nut.
Reassembly is the reverse of these steps.
Usage Tips:
-
When reinstalling the spring, align the spring seat studs parallel to the frame rails. This makes reinstallation onto the A-arm easier.
-
While reinstalling the A-arm, leave the studs slightly loose on the shock tower to allow some adjustment when lining up the spring seat.
-
You can save time on removal by using the vehicle's weight to compress the spring:
-
Remove the shock, install the compressor, and tighten the nut until it contacts the flat plate or shock mount.
-
Then jack the car up and place it on stands — the spring will already be partially compressed.
-
Proceed with the steps to remove the A-arm.
-
Share