TommyZees
1963-1964 Ford Galaxie Offset Shaft Stabilizer Bar
1963-1964 Ford Galaxie Offset Shaft Stabilizer Bar
Couldn't load pickup availability
Lower Control Arm Stabilizer Kit Instructions – '63–'64 Galaxie & Marauder
In 1963–1964, Ford introduced an offset shaft design on the front lower control arm pivot bolts of Galaxies and Marauders. While this design improved ride comfort over rough roads, it caused unwanted movement at higher speeds, resulting in vague and unstable front-end handling.
To address this, Ford used fixed pivot bolts or bolt-on braces in high-demand applications like police vehicles and taxis. This kit replicates that fix — and improves on it — by locking both lower pivot points together with a fully adjustable stabilizer rod. No drilling, welding, or permanent modifications are required.
Key Features:
-
Simple bolt-on installation — no welding, cutting, or drilling.
-
Fully adjustable via left- and right-hand threaded rod ends.
-
Maintains alignment and dramatically improves high-speed stability.
-
Clears most sway bars and is compatible with common suspension setups.
-
Proven design — installed on my personal road-race '64 Galaxie, tested at triple-digit speeds.
Compatibility:
✅ Works with the following engines:
-
Small Blocks: 260, 289, 302, 351W, 351C, 351M, 400
-
Big Blocks: All FE engines (352, 390, 427, 428)
❌ Does NOT fit 429–460 (385-series) engines unless you first provide a measurement:
-
Measure from the back of your crossmember to the front edge of your oil pan and contact me to verify clearance.
Included in This Kit:
-
(2) Bolt-on mounting brackets
-
(1) 6061-T6 aluminum stabilizer rod
-
(1) 5/8" left-hand thread rod end
-
(1) 5/8" right-hand thread rod end
-
All required mounting hardware
Installation Overview:
-
Raise and safely support the vehicle on jack stands.
-
Bolt the mounting brackets to the existing control arm pivot bolts — no modification needed.
-
Thread the left and right-hand rod ends into the aluminum stabilizer bar.
-
Attach each rod end to the corresponding bracket using the included hardware.
-
Adjust the stabilizer bar length as needed to eliminate play, then tighten all jam nuts and hardware.
The installation takes only a few minutes with basic hand tools. Once installed, this stabilizer will eliminate unwanted movement in the lower control arms, greatly improving handling and road feel — especially at highway and performance driving speeds.
Installation Instructions – '63–'64 Galaxie Offset Shaft Stabilizer Bar
The purpose of this stabilizer bar is to lock the factory offset lower control arm shafts in place, preventing them from rotating during driving — a known issue that can affect camber, caster, and toe at speed. This simple fix brings noticeable improvements in front-end stability.
Important Notes Before Installation:
-
The stabilizer bar you receive may differ in appearance from photos in the eBay listing, depending on current suppliers. Some bars may be aluminum, steel, cad-plated, or painted black — all function identically.
-
If your vehicle was recently aligned, installing this bar will not affect your alignment if you follow the steps below.
-
If you're doing a full suspension rebuild or it’s been years since your last alignment, a new alignment is recommended.
-
-
While this bar is designed to fit the vast majority of ’63–’64 Galaxies, please be aware that prior collision damage or irregularities could affect fitment.
What You’ll Need:
-
Basic hand tools (ratchets, sockets, wrenches)
-
Jack and jack stands
-
Anti-seize or light lubricant (already applied to the bar)
Installation Steps:
-
Raise and safely support the car on jack stands. Make sure the front wheels are off the ground and suspension is unloaded.
-
Remove the two factory nuts from the offset shaft studs on the lower control arms.
-
Install the two attachment brackets onto the exposed studs.
-
The studs on the brackets should point toward the engine.
-
Position the brackets as horizontally as possible, ensuring both the offset shaft studs and the bracket studs are on the same plane.
-
-
Reinstall and tighten the original nuts on the offset shaft studs to secure the brackets.
-
Lower the vehicle back to the ground and roll it forward and backward a few times to allow the offset shafts to return to a neutral, settled position.
-
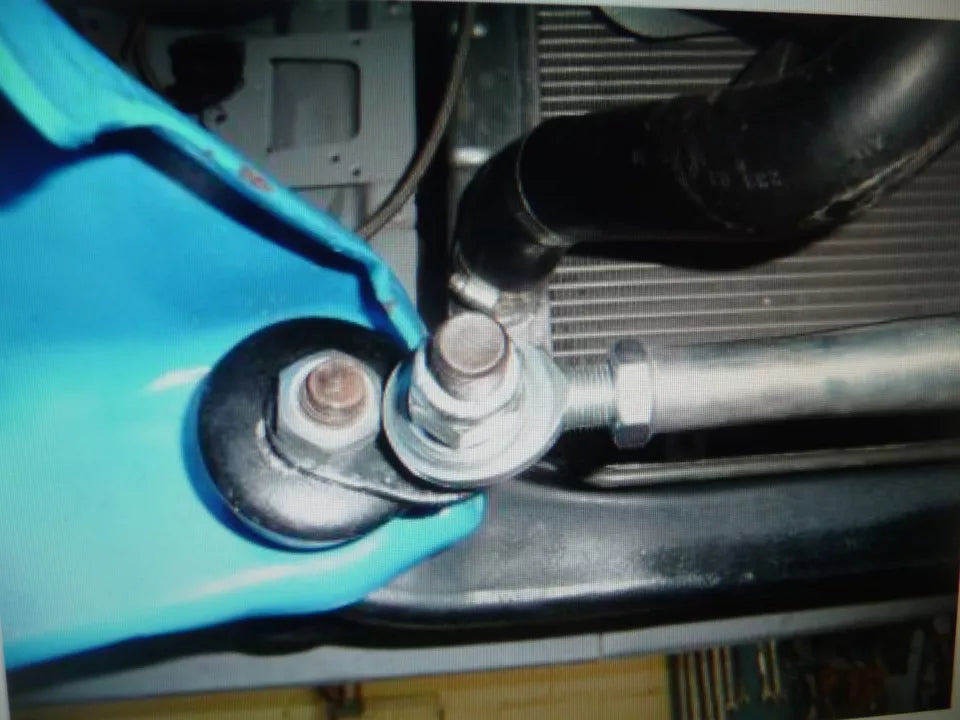
From inside the engine bay, slide the stabilizer bar over the studs on the two installed brackets.
-
Do not lift the car during this step — installing the bar while the suspension is settled will ensure alignment remains unaffected.
-
The stabilizer bar has left- and right-hand threaded rod ends. Rotate the bar to adjust the length until it fits snugly over both studs. The threads have been pre-lubricated with anti-seize for smooth adjustment.
-
-
Secure the bar to the brackets using the included nuts.
-
Once attached, tighten the jam nuts on both ends of the bar. Use two wrenches — one on each jam nut — and gently snug them to lock the bar in place. Over-tightening is unnecessary.
-
Recommended Alignment Settings:
-
Camber: ½° to 1° negative
-
Caster (manual steering): 1½° to 2° positive
-
Caster (power steering): 2° to 4° positive
-
Toe: 1/16" toe-in
If you have any questions during installation, feel free to reach out. I’ve used this same setup on my personal road-race '64 Galaxie and can walk you through anything you need.
Share